Hello all my crafty fabulous friends! As promised I have a free digi for you! I will be back Monday with a baby's album, have a terrific weekend, I plan on visiting all of you!
March 30, 2012
Free digital Friday!!
Hello all my crafty fabulous friends! As promised I have a free digi for you! I will be back Monday with a baby's album, have a terrific weekend, I plan on visiting all of you!
March 29, 2012
New Card fold...Invented By Moi!
(Please scroll down for the Craft and Green "Hot and Happy, LTC Masculine" Challenge!)
Wow, where did the week go? I can't believe it is Thursday already and March will be behind us in a few days. It is nice to see you here again and today I have two projects to show you.
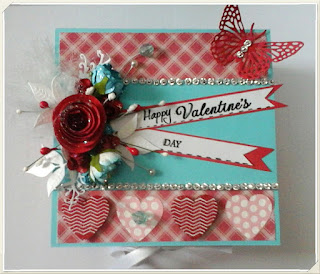
The first project is a card that I invented, I did it a couple of weeks ago and today I got to courage to show it to you , I would love to hear your feed back on it whether you would ever consider making one of these , it is quite simple. it stands really well when reinforced a little with ( Ahh!!! can't tell yet!, I have a trick up my sleeve and I know all you crafter's have this item in your stash.)
Here it is, I really love the shape of it. You will have to forgive my picture taking today, I was playing around with the settings and I can't take a picture without a little or a lot of blur... gotta get this fixed!
Perhaps in the next week I can put together a picture tutorial... I am still not brave enough to put together a video even though I have everything I need and studied how to do it!!! Eeeeeek!! I need to go to see the Wizard of Oz for courage.
You can remove the center card, I was thinking of making a little mini album that I can place there instead, maybe just 3 pages so it is not too heavy. |
2nd Project
Crafty and Green "Hot & Happy, LTC Masculine" challenge
The second project is a card I made for Troy's nephew, he is 17 today! Troy is quite the comedian and to really personalize this card Troy had something to say to him, see below, hahahahaha
This is a digital that I bought from Kenny!, he has really amazing digital's and quite the artist!
I am entering this card into Crafty And Green "Hot & Happy, LTC Masculine" challenge, too bad my camera is messed up but I thought I would give it a try anyway!
hahahahaha, Troy is just too funny |
Thanks for visiting, have a terrific day!
March 27, 2012
Owl Always Be There For Yoo
FCCB CHALLENGE (Out like a Lamb)
This is my second post today , click here to see Wisp Tutorial (Frenzy) and my little fella's new hair cut!
I love joining the challenges over at FCCB (Fantabulous Cricut Challenge Blog), I get to see many other creations in the link up section. This weeks challenge is called "Out like a lion" and we are asked to make a project with a gentle animal, lamb, kitten, puppy etc. I wouldn't normally consider an owl to fit in the gentle category but this fella looks harmless , lol
I used the cricut cartridge Cindy Lou to make the layered owl and I love him! I also tried using different bright contrasting color combination and I love the way it turned out!
Here is my project!
Tomorrow I will be posting about what cutting program can be used with Cricut expression.
Thanks for visiting!
Wisp tutorial (Frenzy)
Hello my crafty friends!! I have a couple of things I would like to share with you today. Over March break Michael came to me wanting a Wisp! What's a wisp??? Glad you asked for I had to ask the very same question. It is a Sonic colors character, Michael plays Sonic Colors on his Wii. Thinking this would be a great motivator for Michael I said sure and started looking where to buy it, NOWHERE!!!! These characters are not made into plush toys and how was I suppose to explain that! ( For those of you who don't know Michael has autism and finds it hard to understand concepts) ...so instead of disappointing him I said "Well , you and I should make one!" Considering he wouldn't have to wait for it to arrive in the mail he was delighted!!! So we got started right away.
First I found a picture on Google, this one! How hard could it be to make a plush toy right? lol
Next I got an old purple shirt and used a white sewing pencil to draw this crazy critter free hand.
I added a few pins to keep in place because when I cut it , I cut through both layers ,
Then I outlined the whole image about a half an inch as shown on the left side in the picture...
(Please forgive the first few pictures, they are a little dark, then I opened the curtains..yeah! Amazing what light can do!)
I just drew a straight single line in tight areas such as this one , there is not enough room to do a line on each side.
Cut it!!!
This is what it looks like when you cut it out, better color now right?
Next sew on the white line but remember to leave an opening so you can stuff it...
Here I put Michael to work and there was no argument, he loved it!!!!
He is a natural!! Just look at the ball of cotton underneathe his arm, hahaha
He is really into it here! The expression tells all.
Next I just cut out a mouth out of black felt and at last the result!!! Hey it may not be perfect but we were brave to try it and Michael is soooo attached to it!!! He even sleeps with him, I think he is so amazed we made a plush toy.
Looking at this picture I realized Michael was really in need of a hair cut so why put the scissors away!
Michael's New Hair cut!
Have a fantastic day!!!!!!!!!!!!!!
First I found a picture on Google, this one! How hard could it be to make a plush toy right? lol
Next I got an old purple shirt and used a white sewing pencil to draw this crazy critter free hand.
I added a few pins to keep in place because when I cut it , I cut through both layers ,
Then I outlined the whole image about a half an inch as shown on the left side in the picture...
(Please forgive the first few pictures, they are a little dark, then I opened the curtains..yeah! Amazing what light can do!)
Next sew on the white line but remember to leave an opening so you can stuff it...
He is a natural!! Just look at the ball of cotton underneathe his arm, hahaha
He is really into it here! The expression tells all.
Next I just cut out a mouth out of black felt and at last the result!!! Hey it may not be perfect but we were brave to try it and Michael is soooo attached to it!!! He even sleeps with him, I think he is so amazed we made a plush toy.
Michael's New Hair cut!
Have a fantastic day!!!!!!!!!!!!!!
March 26, 2012
Masking Technique Using Stamps
Well I hope you all enjoyed the fantastic weather we had for March break! We sure did and believe it or not we are back to wearing our winter boots. (boo hoo) It's hard to know when to put those winter clothes away, we were wearing shorts for 2 days with a whopping 26 degrees and 2 days later below 0... there really must be something to this Global Warming hey???? Well I'm confused thats for sure, hahaha
Today I want to share with you a a technique that I learned from Card-Making-Magic.com , the lovely Christina is always inspiring me for she is up to date with all the techniques and is so awesome to go through all that work to share it with us!!!
The technique is called MASKING. Christina has an awesome easy to follow tutorial with pictures so take yourself on over there right now so you can understand my card. (I will wait for you!)
dee doe dee doe
(Whistling)
Ok, you're back! Soooo as Christina suggested I looked and seen what stamps I could marry together and unfortunately I didn't have any little girl stamps nor did I have and nature stamps! (Note to self, GET SOME!!! ). What I did have was a sentiment stamp with a border and and decor square stamp that cost a whole dollar...
I was determined to use this technique so I went for it and I was sooooooo pleased with the results!!! The stamps I used were wooden and I recommend clear so that you know where you are placing it on the paper... I was pretty much eyeballing the whole time.
Have a great day and hopefully I will see you again tomorrow, I have something really different to show you!!
Subscribe to:
Posts (Atom)
FOLD OVER BOX - Video Tutorial and Written Instructions
Hello! Today I am sharing with you how to make a "Fold Over Box", a tutorial by Liz Walker Combine gift and card in o...
You may also like...
-
Hello all my beautfiul bloggy friends!! You will never know how nice it is for me to be able to say that... My sister and I were in a car ...
-
Happy Friday!!!!!!!!!!!!!!!!!!!!!!!!!!!!!!!!!!!!!!! I love Fridays, usually because I get to have Michael home but he has been home with m...
-
If you are looking for the "Birthday Bash Bloghop" for Amy Jo, go here . Hello bloggity friends!!! I am so geared to the teeth...