January 5, 2013

Black and White + 1 # 79

Hello!!

I hope you are all having a fantastic Saturday, it is that time again to challenge you over at HIMCR!
This weeks challenge is to make a project that is black and White with an additional color of your choice. 
We can't wait to see what you will make, just link up after you take a look at what the design team has put together to inspire you, it will be at the end of the post.


For my project I made a black, white and weathered blue card.
Nothing is considered strange as to what you can use when it comes to scrapbooking or card making, right???  Maybe I am on the boarder line if there is one with having used
Styrofoam Sill Gasket, hahahahaha
It works great! Here is what it looks like along with my beautiful new stamp I got from Michael's store while in Halifax with Michael.


Here is the effect it has, I love it!!!


Next I made round paper distress flowers from my Candy Doodles CD and finished it with a slightly blue pearl.


And finally I added a butterfly I stamped and cut out and sparkled it up using silver embossing powder.


Have a fabulous weekend and thank you for joining us at HIMCR!!!!!

January 4, 2013

Sugar & Spice

Happy Friday!!!!


I hope you all had a very productive week, I did!! I got my blog post done everyday along with joining up for a blog makeover course!!!!(making my New Year's resolution a reality)
 
Today I am sharing a card with a digital from my Polka doodles Cd, Candy Doodles that was given to me by Christina over at Flowers Ribbons and Pearls!
 
The circles and butterflies was the backside of an envelope I received from Em over at
 I was so delighted to get such a beautiful Christmas card from Em, you can see it here! (It is the first image showing) Thank you Em!!!!


The candy and sentiment is from Jaded Blossoms "Sweet Celebration" stamp set, I love them so much. I stamped the candy on pattern and white paper and added stickles for a little sparkle.


  Have a safe and beautiful weekend my friends , I will be back to see you all on Monday. I have decided to do my projects over the weekend and get started at my blog makeover course, yipee! I have to catch up so I can get back to joining the design teams I am on!! Oh boys, lol

January 3, 2013

Love Card Using Tranparency Paper

Happy Thursday!!!!!


Today I am excited to show you my card using transparency paper!  I used Stazon black ink to stamp the word Love and then spruced it up with gold stickles. I am getting plenty use of these beautfiul butterflies I received from Kelly for Christmas!


Have a super day!
 

January 2, 2013

Free "Unique Friends" digital

Hello all!!

It is that time again and I am so excited to give you this digital I created over the weekend, I also made a card to give you inspiration!

I used Pearlx to  paint my image as I get use to using Spectrum Noir Pens, I hope to create a card for every digital in the future.

Enjoy and I hope you all brought in the New Year with friends or family, we had a night of good ole fashion board games! So much fun!!!


Sorry this digital has been removed, you can buy this digital here for just $1.00

Here is the card I made, This digital is great to emphasize a unique friendship!


I turned down the lights and held this cute fellow under direct light so you can see the effect of Pearl X, it has quite a shimmer doesn't it?


Have a fantastic day and tell all your friends to grab this guy while they can!

I have requests for digitals after they are no longer free, you can get any digital of mine for just a dollar at my online store, www.creativebugdigis.com   I hope this helps.


January 1, 2013

Origami Photo Cube /2013!!!


Happy New Year!!!!!

It will take some time remembering that it is 2013, they say if you say anything 3 times you are more likely to remember, so here goes, say it

2013!!! 2013!!! 2013!!!

Do you believe in New Years Resolutions??   I am going to freshin up my HTML skills and start doing blog makeovers!!!!!  Yeah? Yeah?.. so by next year I should have another website offering my services to beautiful people like you!!!!

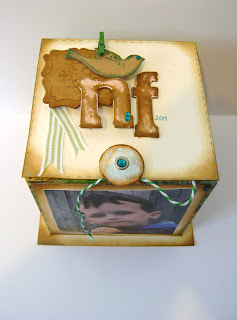
I love getting creative and coming up with something I haven't seen before (that is not to say it is not out there somewhere) I have seen photo cubes that you can buy that are made out of chipboard but mine is two half squares that I accidently stumbled upon while playing and learning how to do origami! To make it stronger I used two 8" squares cut out from cardstock.

I put together some what of a tutorial, but you will get the idea.

First here is my project: The photos used were sweet Michael on our trip to my hometown in 2009


Ok! So here we go:

First get two pieces of 8" bt 8" cardstock, you will do the same with both for two parts make up the cube. (I used paper for this tutorial)

Fold from opposite corners both ways : here is a picture on one way, you then have to do it again to the opposite corners.


Flip paper over and fold in half, again do opposite sides


The creases should look like this when flattened out: (Sorry it is so hard to see!)


Finally do this  (it was hard to do with one hand!!!! LOL)


The next step would be to glue to keep it together then make an exact copy.
Fit one over the other and glue in place.

Next I added a flap that opens on top and made a closure for the bottom and embellished it! Voila!
Have fun!
Hugs

December 31, 2012

So happy to be back! / Today belongs to you Card


Hi!
I hope you all had a fabulous Christmas and is still enjoying getting out and visiting your friends and family, our Christmas was amazing and still is although my waist is not happy with me, hehe!

 I want to thank all of you for such wonderful support and comments about the accident my sister and I were in, We are feeling soooooo much better and reading your comments really help lift my spirits and Norma's...just knowing you took your time to read bad news especially during Christmas!! Thank you from the bottom of my heart. I still have a very sore back  and will be only doing what I can in moderation and I am off to a great start!!! I love this card... It has to be one of my favorites of mine to date.


Click on image to see the sparkly details!

For the background I used a small grill, I placed it on an angle and stamped with Tim Holtz black distress ink.
The red polka dot background was fabric that covered a bottle of cranberry sauce, let me tell you that bottle was decked out and it was delicious, the cranberry sauce that is, lol

I got these photo slides and the butterfly from Kelly (Theresa's mom!) for Christmas along with  many other awesome scrap items I can't wait to try, eeek!

The pure life button came with a stamp set I ordered from Jaded Blossoms and the arrows I doodled

If you click on the image you can see where I added silver stickles to give that extra sparkle , I really love how this turned out.


I have projects ready for all week and can't wait to show them to you and don't forget it is time for a freebie which I will give away Wednesday, I am happy to say I created a card using my own digital which is a rare occurrence but will become routine to help give you inspiration! Oh yes , getting down to business, I am so thrilled to be back.
 
 
Hugs


FOLD OVER BOX - Video Tutorial and Written Instructions

Hello! Today I am sharing with you how to make a "Fold Over Box",  a tutorial by Liz Walker Combine gift and card in o...

You may also like...