November 10, 2012

More Simple Christmas Cards

Happy Saturday!!!


 I hope you are all having a wonderful start to your weekend! I am inspired to do more Christmas cards today but I thought I would drop in and show you a few simple ones I did this past few days.
I did these cards for people that I have run into in my life , we may not see each other often but because they  impacted my life during the short time we spent together I wanted them to know I am thinking of them.


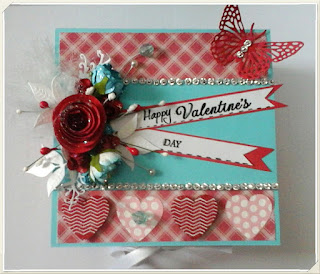
I love Mirror Card!!!!! I added gold ribbon behind  on the layer behind the sentiment.. isn't it shiny and awesome!!!! (One of the many things given to me from Christina when she came to visit!)


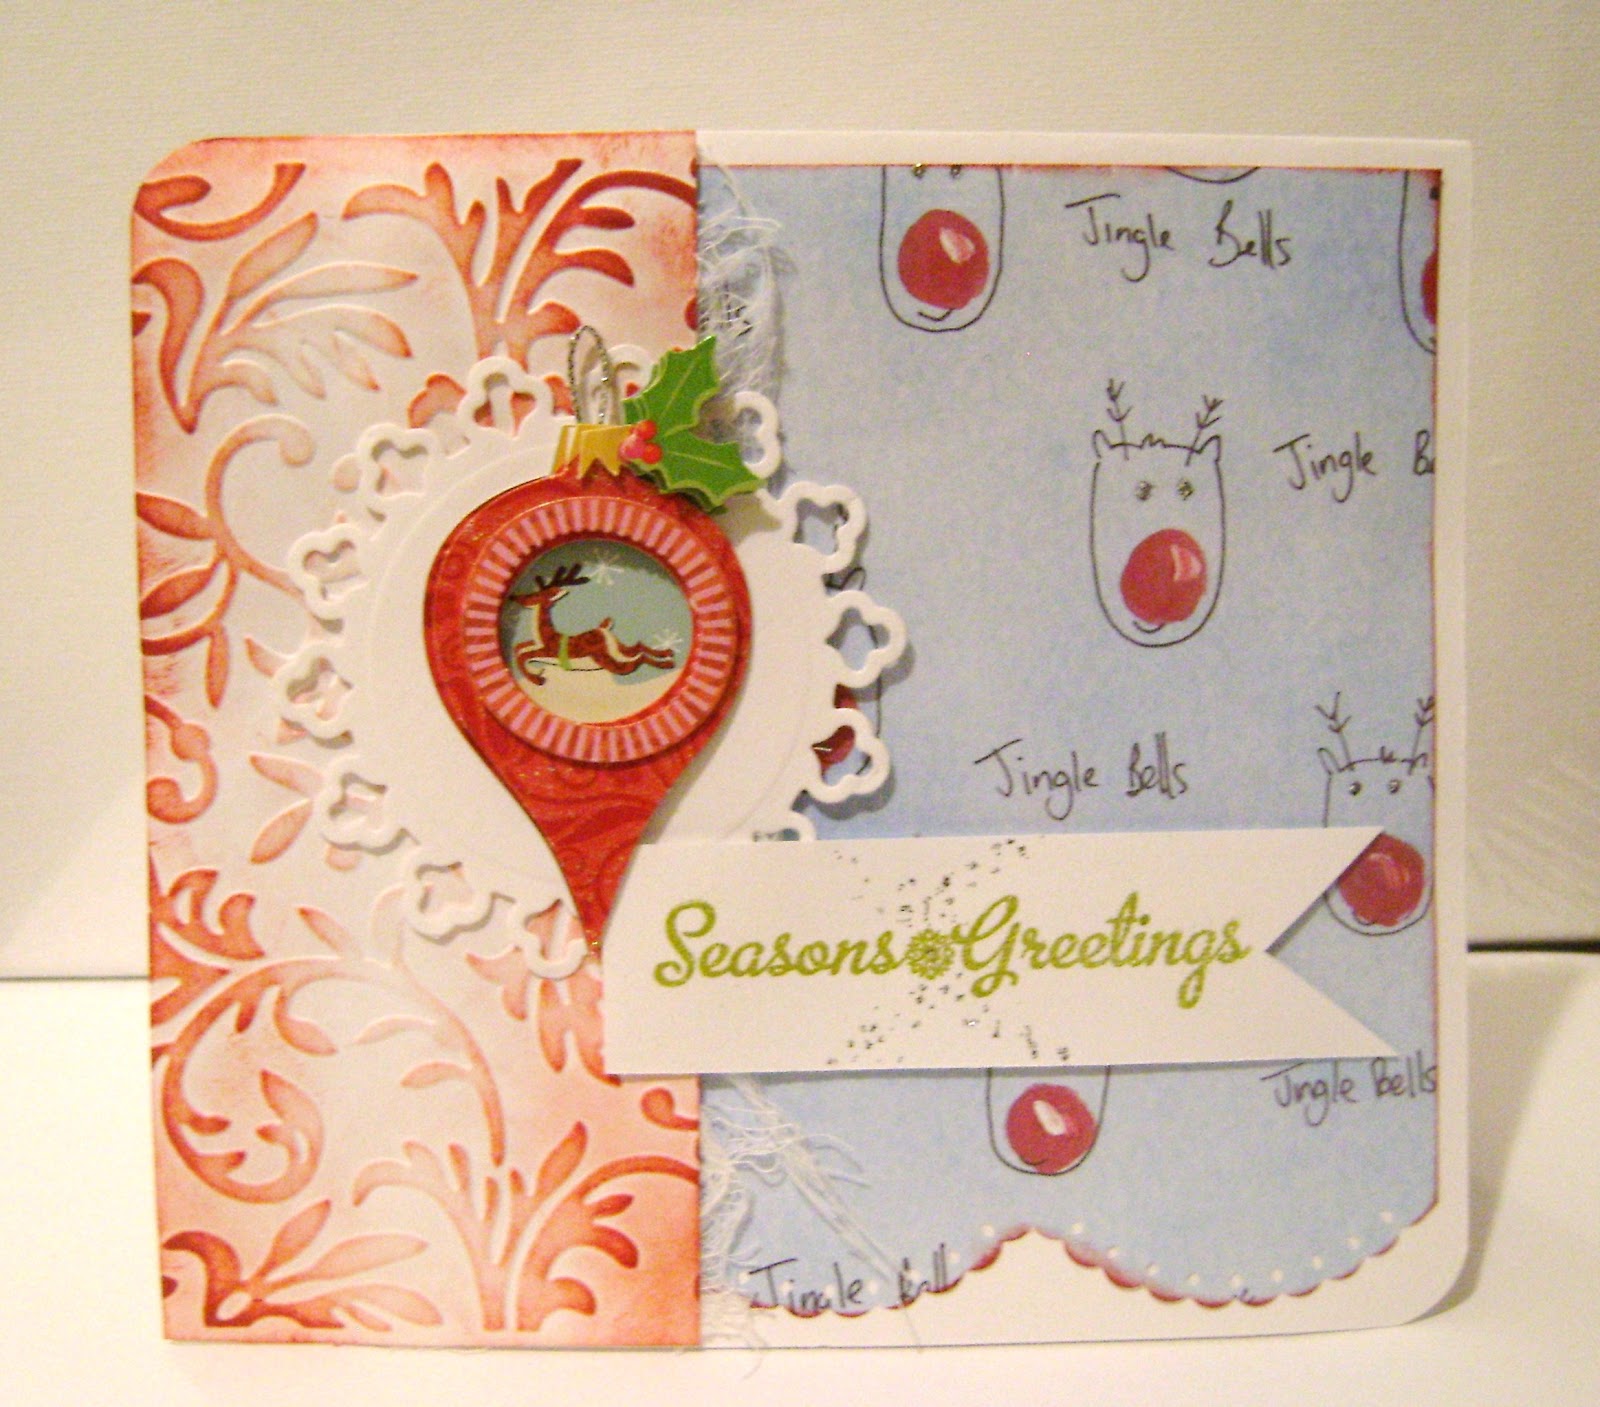
I embossed the floral image and greetign on this card and inked the edges using Ruby from Recollections and Tim Holtz red brick distress ink.


I embossed the panel and added the 3D bell from Papermania (Mistletoe Kisses).. I am still learning how to form the perfect pearls which you can see for yourself, lol.. I used Aqua by Pearly Scrumptious and the sentiment is from Cardz TV!


This card I did during the summer, I had particpated in a challenge where we had to make 13 cards in so many hours.... (forget how many)... The bell is also from Papermania (Mistletoe Kisses)


Have a fantastic day!!!!

November 9, 2012

Guest Designer at 3 Girl Jam!

Happy Friday!!!!!

I am so excited to be guest designer over at  3 Girl Jam Blog today, eeek!! If you have been following you know I have used their products with their latest being the bow maker, (I fell in love the very first time I tried it)
If you want to learn to make bows easily I strongly suggest buying this inexpensive tool,  it has changed my whole attitude on bowmaking , it is soooooo simple to use!! Go to  3 Girl Jam Store!!! to check out the awesome price!! While you are there you may also want to check out their homemade crinkled ribbon done up in beautiful bundles.

Now on with my project!

 I used:

  • Wine and Jewels ribbon bundle -3 Girl Jam
  • Bowmaker - 3 Girl Jam
  • red/white twine -The twinery
  • recycled gift box
  • Patterned paper -Michael's Store
  • Image and tag- from old gift bag
  • tree - from old christmas card
  • grommets - stash


This box is an old gift box that was given to me from a sweet friend, inside there were 3 body moisturizers sitting up on the stand... I will be adding 3 small gift boxes that will be sitting on this stand..(can't say what will be in them!)

How I made it:

I  measured two alternate sides using pattern paper and double scored an eigth of an inch apart to cover the edges,  It has an acetate front which I have added a sweet image I cut from a Christmas gift bag.. the background image inside is from an old Christmas card  which friends save for me instead of throwing them out....recycle recycle!!!


 Here is a better view of the bowmaker!!


This tree is much brighter and richer in color but taking a photo through acetate made it look a little frosty... what's so bad about frosty during the holidays right??


Have a fantastic day and I hope you take the time to hop over and say hi to Julie, the amazing woman behind 3 Girl Jam!!!

November 8, 2012

Traditional Chrismas colors

Hello!!

I hope everyone is having a terrific week! I have been cooking up a storm using recipes from Dr. Oz and we are loving them! My house smells like garlic, ginger, cumin and tumeric for 3 days now, lol
Oh and I have every baked good ready in my freezer for Christmas!!!! I am doing up baskets for my friends with everything in it from pickles to snowballs... I am so happy I just bought the preserves Cricut Cartridge , this is certainly going to add to the beauty of my baskets, eeek!!! I will certainly be posting pictures of them.

But for now I am sharing another Christmas card I made... I know a lot of you are doing Thanksgiving cards but as you know it is over here in Canada and that gives me more time to get ready for Christmas!!


To visit my online digital store go here:  www.creativebugdigis.com

Have a great day!
Hugs

November 7, 2012

Sunset Beam

Hello!!!

I am just dropping in to say hi to all of you and to wish you a happy Wednesday! I have many cards to show but I have been soooo busy today I didn't get a chance to take pictures but I did take a picture on my deck this evening!
It was spectacular in real life and I had so wished the camera would have captured all of it's beauty but I am still pleased, so pleased I uploaded it to our local network and hope to see it on my TV screen in the next week!!! 


Here is it!

See the beam of light!!!! I thought heaven was opening up , I was so ready I said "Beam me up Scottie"

Have a terrific day my friends.

November 6, 2012

Deck the Halls!


Happy Tuesday!


Today I am showing you another simple card I made for Christmas (yes, I am actually getting them done this year!)


This one didn't turn out as I expected but I still like it!  I needed a hole punch the size of the christmas balls stamps.


November 5, 2012

25 days of Christmas!!

Hey again!!! This is my second post today, click here for "Simple elegant Embossed Christmas card"


I wanted share an event with my bloggity friends!!!
Damaris over at
is having a 25 Days of Christmas event!!
Hop on over where you can read the rules
and join in on the fun!!! This is my first event, so excited!!!
Happy Monday!


Simple Elegant Embossed Christmas Card


Happy Monday my bloggy friends!

I hope everyone had a great weekend, I organized my scrap paper and a few shelves .. trying to stay on top! Is everyone still on the old clock or did you adjust well? I have been up since 5:00 am ready to craft, hahaha

Today I want to show you an elegant Christmas card I made for a special person... (can't say who!!)
I love the simplicity of this card and will be making many more like it for sure!


How did I do it???
  1. Use white card stock and cut it at  51/2" by 81/2" to get the card base
  2. Cut silver mirror card at 51/4" by 41/4"
  3. Cut white card stock 5" by 4" for 3rd layer
  4. Emboss stamp on silver mirror with watermark resist (ranger) , add white embossing power and heat... ( For my stamps I used delightful decorations by Stampin Up) , a treat from Christina!
  5. Cut out stamped images and place as seen in the photo.
  6. Using a paper piercer too.and Tim Holtz idealogy ruler to pierce holes resembling string from which the bulbs are hanging.
  7. Stamp your sentiment as shown in the photo.. My sentiment is from "Holly Jolly" by Cardz TV with Mary.


 Have a fantastic Monday!!!!

To visit my online store go here: www.creativebugdigis.com

( I predict a giveaway in the very near future!)


FOLD OVER BOX - Video Tutorial and Written Instructions

Hello! Today I am sharing with you how to make a "Fold Over Box",  a tutorial by Liz Walker Combine gift and card in o...

You may also like...