May 3, 2012

Card Bundle/ Organizing Solution for Ribbon/Free digi


Is it Thursday already?? I honestly don't know where this week went... I have been busy organizing and shopping, hehe
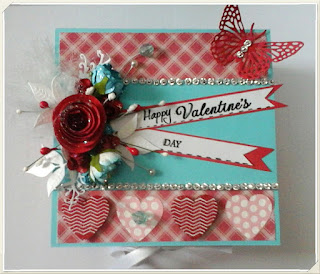
I have been wanting to do an altered envelope box project that will hold at least 12 cards so as I am waiting to find the perfect box I got started on the cards...

I made sure to have very little dimension so they can be mailed at minimal cost. I am making this project for a very special person in my life and I thought how great it would be that when she needed a card she could go to this box and pick one instead of having to wait for me to make one for her! 

I got the stickers from E.A.D. Designs and would have never known about them if it weren't from Jessica from over at Chick-n-Scrap, thanks Jessica!!!

These cards were inspired by a card that Jessica did and I fell in love with it, scoot over and check out Jessica's blog, she is beautifully talented and I love her style.


So as I said, I am organizing and this is something I came up with for sorting leftover ribbon pieces and twine!!
A friend of mine gave me all these containers and they needed a little sprucing up so I covered them in different pattern and solid papers... I allowed the ribbons to hang out a little so that I didn't have to look inside to find a color that I needed, also I could put any color in any bottle!
I am planing on staining the wood box that the containers sit in with coffee, yes coffee!! Did you know that coffee makes the best stain job and it is eco friendly!!! I will show it to you when I get it finished.

I hope this inspires you to keep your ribbon organized!

Can you picture the wood covered with coffee stain!!!!!

This is what it looked like before I covered it in decor paper. They were used at a factory and I am lucky enough to have friends that think of me on their travels or in their everyday life wondering if I could use this or that for cardmaking or organizing... gotta love it!!!

Much better covered right!
I wasn't able to post yesterday nor will I be able to post tomorrow which is why today my post is loaded! So one last thing , a free digi!!!!

This is a png. file so you can print it on pattern paper or colored paper and the 3 flowers in the center will take on that pattern or color... just remember so will the blue flowers so if you use yellow paper, you will get a green flower.... the best solution is to print it twice... do your pattern on the second print then cut the flowers out and place them on the first print!

May 2, 2012

Waterfall Card/ love you a latte


Hello everyone! I decided to be brave and try out a waterfall card! I had searched for the right tutorial and to my surprise Christina over at FlowersRibbonsandPearls (my biggest inspiration) was the fourth one I came upon and the BEST  over at youtube! I shouldn't be surprised at all for Christina's website is the biggest card making site I have ever come across, I have been visiting for over 3 months and still haven't seen half of it! I can't even imagine all the work that has been put into it... Christina , you rock!

If you want to learn how to make this waterfall card just either go to the written tutorial done by Christina HERE or go to Christina's video tutorial HERE( Be warned , once there you may not be able to find it in yourself to leave)


The Waterfall Card is fun, elegant or even magical for a child depending of course on papers and the images you use... all you do is pull the tab and watch it all flip over creating a waterfall effect

Usually a waterfall cards run downward but for something different Christina did it horizontal... I think we should give it a new name!!!! What do you think?


I love you a  latte !!!!


 Have a terrific day, I know I will!!!!

April 30, 2012

Happy 20th Anniversary!


Happy Monday everyone!

I hope you all had a great weekend, mine was really busy as it is today but I dropped in to show you an elegant "Happy 20th Anniversary" card I made for a friend of a friend. I don't normally make elegant cards but I am happy with the way this turned out!


And here is a picture of my little glicken this morning after he got ready for school, he was in quite the humorous mood! He brings so many smiles to my face, I am so blessed.


Have a  great day!!!

FOLD OVER BOX - Video Tutorial and Written Instructions

Hello! Today I am sharing with you how to make a "Fold Over Box",  a tutorial by Liz Walker Combine gift and card in o...

You may also like...