
Hello!!!
Do you love Enamel Dots? They are the shiny fun dots used on cards and projects , you have likely seen them lately no doubt for they have become extremely popular. You can buy them at different costs depending on the amount but to give you an idea:
54 for $5.50
and that of course is not including exchange rate, shipping or gas money if you have to travel to get it... I have to travel 72km's
I really wanted to buy these but personally I thought they were too much when I considered everything so I went on the hunt to find a better solution... I found countless Youtube tutorials that show how to make them at home but everyone had different times and different heat temperatures so I decided to experiment on my own and share my results with you! They came out PERFECT!!!!
So I made 140 for less than a dollar and have lots of beads left over.
What you will need:
Pony Beads (they come on lots of colors)
Pyrex Dish (I am using 8" by 12" which holds 3 qrts to 2.3 L)
Parchment Paper (Do Not Substitute with Wax Paper)
Oven ( I have a Digital GE{General Electric} )
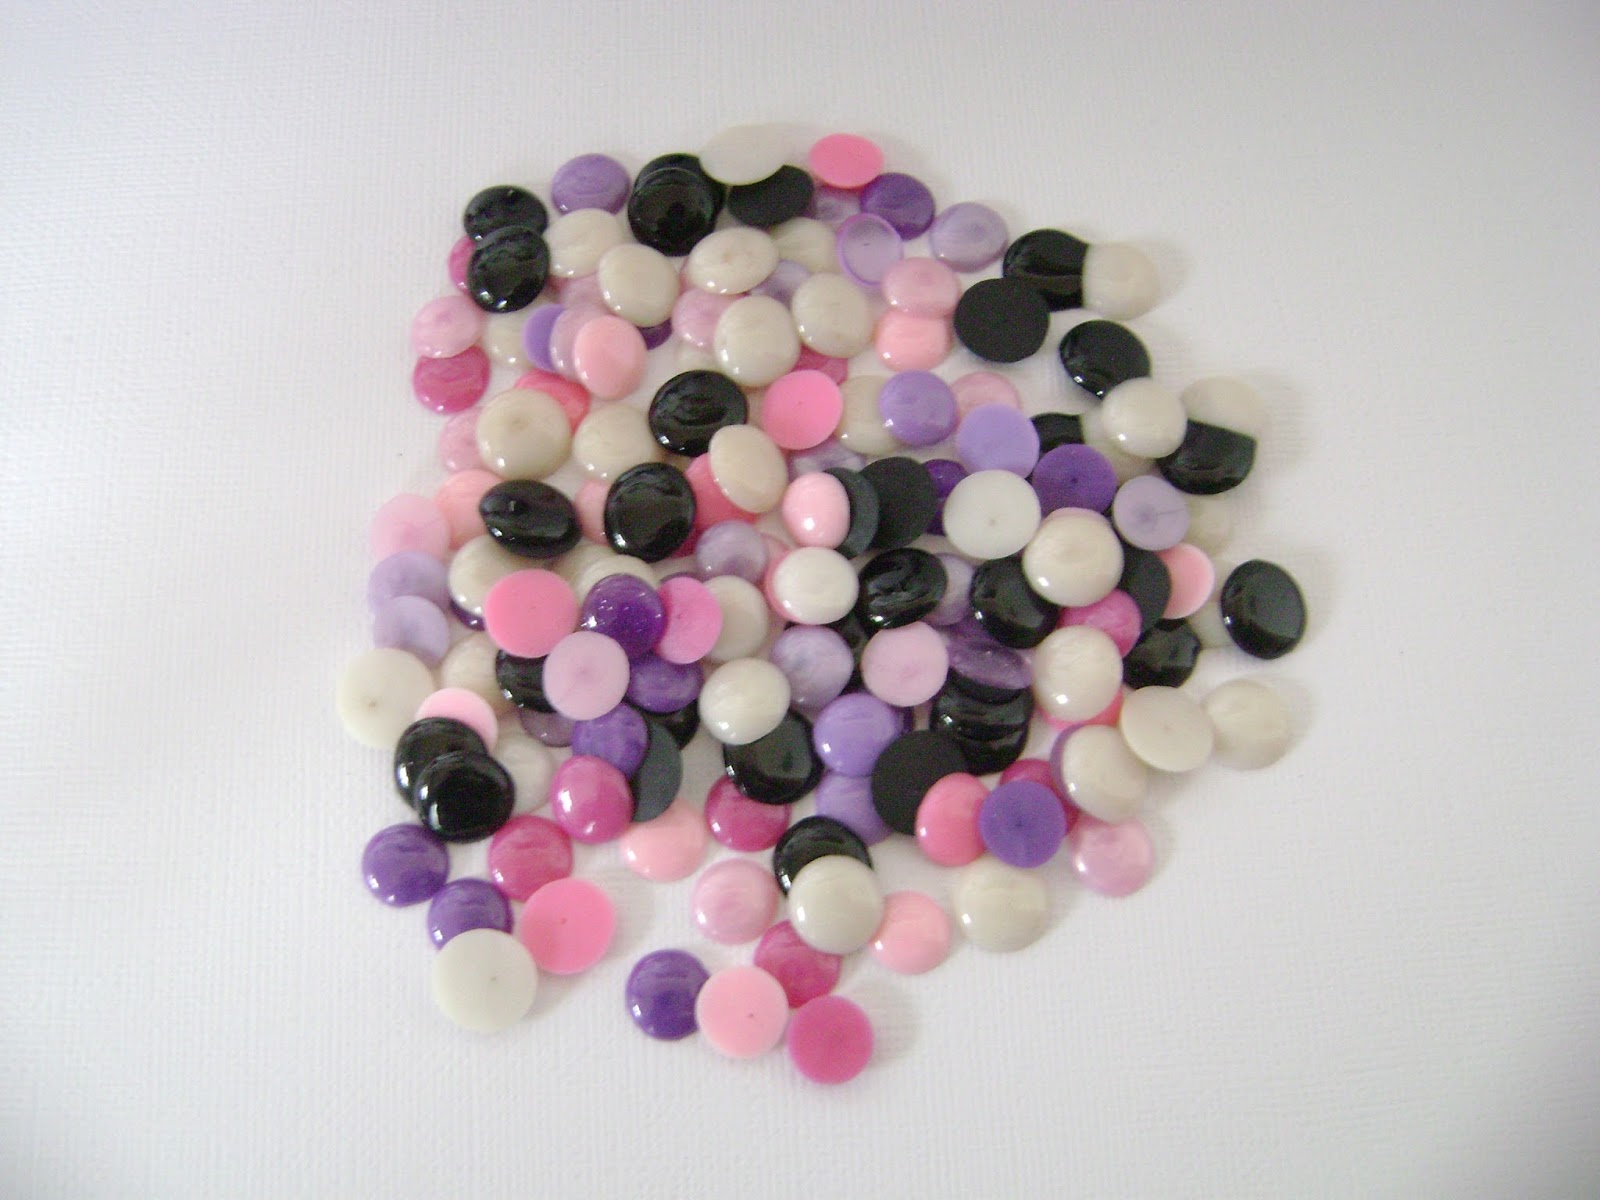
First lay your Pony beads about an inch apart on the parchment paper in the Pyrex Dish so they don't combine as you will see I did with some of them ...

Such as here, I put black and white together which in turn creates a pill that would be perfect for a get well card...

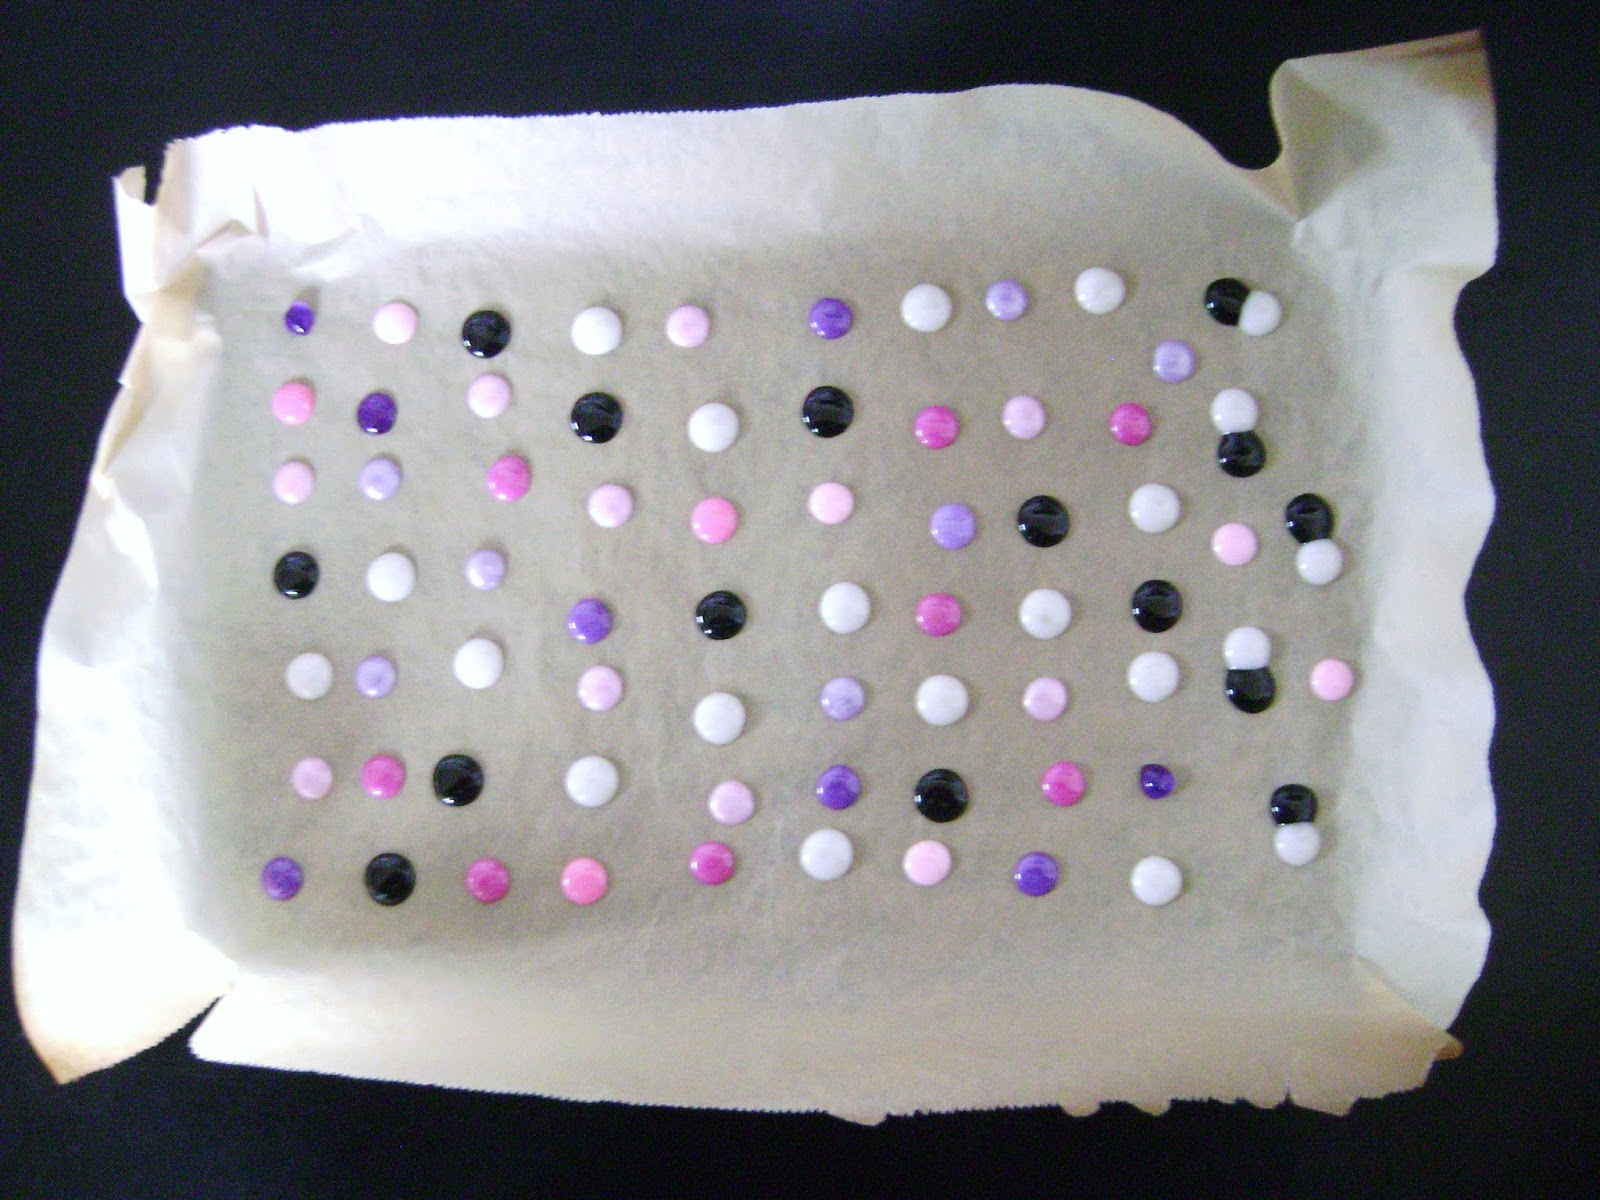
Preheat the over to 475 degrees and place in oven anywhere between 13 and 15, I took mine out at 13 min's
If you want them flatter give them an extra 2 to 3 min's and less time if you want them more plump.
*** Note some will be out of shape like the 2 purple showing in the next image but they look just like tear drops so still can be used so I didn't have to throw any in the trash. ***

Carefully lift the stiffened Parchment paper out of the oven using oven mitts and place on counter so they can cool faster, I give it about 3 min's although they probably cool faster than that. I then take a small ruler or my bone folder to scrap them off and in a couple of sweeps...
VOILA!!!! I can't wait to try other bead types and colors!

Check out these pills!!!! Are they fun or what? Could also be a cute bug if one were to draw legs and attach google eyes.

Finally I gave them a home.

What are the cons?
Some may not like the faint plastic smell it gives off but I assure you if you have the oven vent on and a window cracked like I did you will hardly notice it... Michael is super sensitive to smells and he had no prob which made me very happy. I hope you try it and save money and be sure to let me know how it works out for you!
Have a great day!!!


16 comments:
How ultra cool is that !!! Brilliant idea Naomi and a FAB tutorial. I might even have a go at this myself - I have some strange beads. Don't know if they are 'Pony' beads coz I don't know what they are :-)
Hugz
IKE xx
Wow, these are gorgeous!
Naomi this is sheer genius...on my to do list. Have to raid my daughters bead stash now!!
These are AWESOME!!!!!!!!!!!!!
They look fabulous!! And thanks for the awesome tutorial and pics!! I love how you attached the black and white!! So fun!! Have a great day :)
Lisa
A Mermaid's Crafts
That is very creative! I've been meaning to try that out... I want to buy a little oven just for crafting... very cool!
So fun Naomi. I'm glad the smell didn't bother Michael. I have tons of these somewhere in my attic
Wow, how fun is this! I would love to try these....thanks for the tutorial Naomi!
Have a wonderful day!
Sherrie K
They would look great as flower centres.
Hi, Would really like to know what size pony beads did you use and what size the enamel dots came out? Thanks.
I Loved making the enamel dots! I did a tutorial here:
http://doubleclickconnections.blogspot.com/2014/03/enamel-dots-made-with-pony-beads.html
which is very similar to yours. I also bought a large bag of pony beads and they melted much better than my first 2 packages. I have been using them like crazy! I bought a 5lb bag for 4.99 and I have only made about 1lb of them! Carri~Abusybee
Thanks for an amazing tutorial Naomi! It's one I'll be trying for sure! It would be great to create flowers this way too. Hugs
Me and my daughter have made some and they are super cool and easy to make. Thank you for sharing this idea xxxx
I've seen this a couple of times....I just have to try it! Thanks for sharing....Love the colors!
Thank you so much for this fabulous tutorial. I love the dots and can now make my own.
Have a creative day.
Hugs Nana
♥ My Crafting Channel ♥
♥ Nana's Rag Quilts ♥
♥ 2 Creative Chicks ♥
♥ Silhouette Challenges ♥
absolutely brilliant and lovely colours too. Great tutorial thanks for sharing. Michelle x
Post a Comment