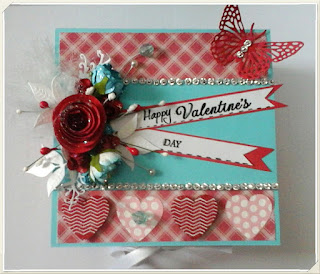
Origami Envelope!!
Today a fellow blogger friend Melissa over at “http://sleeplesswonder.blogspot.com/ had posted a blog a little while back where she made this beautiful clever easel card and needed the right type of envelope so I jumped at the opportunity to show you all how I make an origami envelope.Seeing both Melissa and I are not big on measurements this envelope is a winner, I am sure you will agree. For you Melissa!I have decided to both write and take pictures of directions for those of you who may be visual which would make perfect sense seeing we are creators!
Directions:
Take a piece of 12”by 12” paper
Turn it over on the white side and make a diamond shape
Take both corners on each side and place the tip at the center fold approximately where I have it positioned in the picture below then crease.
Do the other side and it should look like this
Fold up the bottom corner and crease it so that it looks like this:
The next part may appear to be tricky but it is quite easy.... there are two steps....bring the bottom corner you just folded up to the edge and fold inside as shown in the next two pictures.
Fold each side as shown and be sure to but them hard against the edges so you don't have a big seam. (Next 2 pictures)
Finally Slide the top corner under the edge as shown until it will not go any further, flatten and crease. (Next 2 pictures)
Complete!!!! Scroll down further to see alternative ways of closing it.
You can put ribbon around it, here I used a metal ribbon charm, it is heavy so you don't even have to put the top corner under the edge, just let it sit outside. The best part is when you mess up this is a great way of hiding it! (Next three pictures)
On this envelope I used three dimensional gold paint, a sticker and a button sewn into the ribbon.
The measurements of the envelope is 6" by 6" but really who cares if you put a card in it that is 5 x 5?
Scrapbooking cards can sometimes be bulky and it is great to have allowance for extra space!
This is a Graduation card and it was requested that I used the school's theme colors, I love these colors!!!I made these flowers, aren't they cute!!!


7 comments:
OMG Thank you so much for posting this Naomi, you are a true sweetheart.
Hugs,
Melissa D
mkds312@hotmail.com
sleeplesswonder.blogspot.com
love the project and who's facebook are you talking about Faith Bog Hop?
@ Scraping Miami... Hi, thank you ... I was talking about which ever one I had to like in order to qualify for the rewards.... I can't remember the name right of hand but that does sound right... I came across the same problem on another site ... I don't know how I can look for certain groups I like to join their page.... thanks for writing..you are super talented!!! Love your projects! That I do remember, lol
@ Melissa... You are welcome sweetie... like I said I will do anything to help out... have a very nice day. Hugs
Love all of your projects...simply beautiful work! Don't need to twist my arm to follow this blog! I look forward to seeing more of your wonderful creations. I'm very flattered to have you following my blog as well! Thank you for your sweet comments!
Great tutorial! I became a follower and would love you stop by my blog.
Thanks for Sharing!
Shelly
Mypaperlove.blogspot.com
Thanks so much! This was exactly what I needed: a larger envelope to accommodate a non standard card size. Thanks!!!!!!
Post a Comment