

So first you have to select at least 6 different papers, some could have texture like the Mulberry paper I used, or it could be ordinary patterned scrapbooking paper or card Stock.
Actually if you don't have scrapbooking paper you can always use pages in an old book.. Here are the colored papers I used:

I have actually used left over scrap paper that did not coordinated with each other at all and they were some of my favorites so don't get caught up in trying to match unless you want this flower for a certain page with an existing theme.
Next you draw a circle on each piece of paper... each one can be smaller than the previous or you can do 3 the same size, 3 smaller, 3 even smaller etc... I did 1,the next smaller etc... usually I just wing it because I think the flower looks better when it is not perfected so if you don't have the right tools don't worry, just draw a circle the best you can. In the next picture I am using a Circle template in case your design calls for a clean crisp flower. ...
Note:
(I also want to mention just for the purpose of this tutorial I marked on the front side of the paper, this is not the right way, you always do it on the back so there are no lines to erase if you accidentally cut outside the line.)

When this step is complete it should look something like this:

For the pieces that are small you may have a problem keeping the paper still as you draw the circle using the template, a remedy for this is to use repositional tape, just adhere the tape to you working mat and stick the paper on then you are ready to go. The repositional tape can be rubbed off with your fingers or a tape remover tool when finished making your circles...easy peasy!
I had to do that with these papers:

Take note
I numbered each circle from biggest to smallest so placement would be easy
Next we cut all the circles out, again you don't have to be perfect unless your theme calls for it, wing it if not...

After each circle is cut out get out your craft mat, have paper towels handy to catch the water after you spray them as shown in this picture.
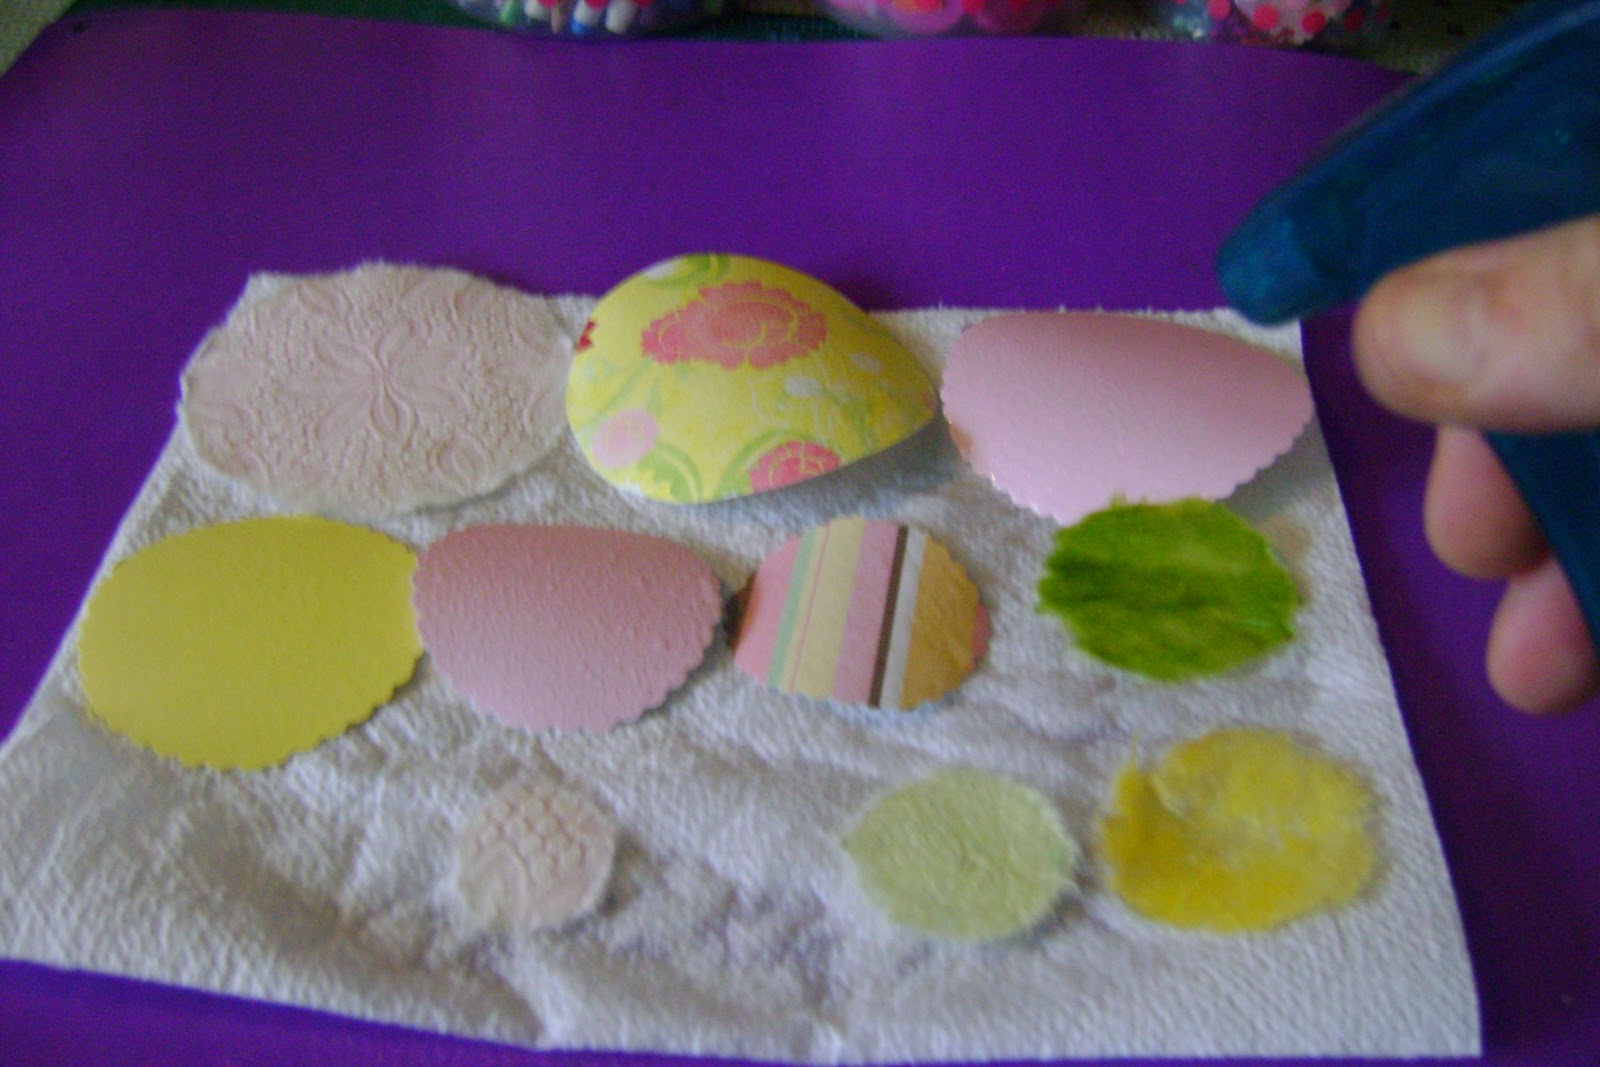
You may noticed I used scallop shaped scissors to cut out some of the circles, you may use what ever type of scissors you prefer.
Next take every individual circle cut out and wrinkle them, I scrunch them in my hands and then very carefully open them , then layer them on top of each other as seen in the next two photos.


The possibilities are endless, use your imagination! I really hope you enjoyed this tutorial, it was actually the first one I ever done, feel free to share it with your friends.


1 comment:
Why would I delete it? You can leave a comment anytime you wish, thank you for visiting my blog!
Post a Comment